by DeniseE
denisee@quiltchat.com
![]()
![]() Have
you ever been in a hands on sewing class with very little space on either side
of your machine for all the necessary notions needed? This may solve the
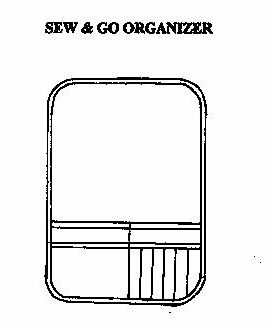
problem. The organizer is used by placing your sewing machine on the quilted
fabric allowing the pockets to hang down for easy access to sewing notions in
front of you.
Have
you ever been in a hands on sewing class with very little space on either side
of your machine for all the necessary notions needed? This may solve the
problem. The organizer is used by placing your sewing machine on the quilted
fabric allowing the pockets to hang down for easy access to sewing notions in
front of you.

| 1/2 yard quilted fabric | |
| 1/4 yard fusible interfacing | |
| 1/2 yard coordinating print or solid for pocket and 5/8 yd for a one way design fabric 5/8 yard for a one-way design fabric |
| 1/4 yard medium weight clear plastic | |
| 3 yards extra wide double fold bias tape | |
| matching thread |
| 1 quilted fabric - 17-1/2" x 21" | |
| 1 lining fabric - 17-1/2" x 21 " | |
| 1 lining fabric - 17-1/2" x 14" | |
| 1 interfacing - 17-1/2" x 14' Pocket I | |
| 1 plastic - 171/2" x 6" Pocket 2 |
| Place wrong side of quilted fabric to wrong side of lining fabric. Pin or baste around edges. If desired stitch diagonal lines approximately 21/2" apart to hold layers together. | |
| Fuse interfacing to wrong side of pocket. | |
| Fold in half lengthwise. Encase long fold edge with bias tape. | |
| Encase one long edge of plastic for pocket 2 with bias tape. | |
| Place pocket 2 over pocket I with raw edges together. Mark vertical lines to form sections for sewing notions. | |
| Stitch through both pockets beginning at bias tape edge, backstitch for security. The following is a suggested guide for sections: |
| 6 - 1-1/4" space for pencils, ripper, hem gauge, marking pens and small scissors. | |
| 1 - 10" space for thread - pin cushion, bobbins, etc. (It is helpful to cut a piece of paper the size of pocket 2 and lay out the sewing notions you like to use. Mark spaces as needed.) |
Please email denisee@quiltchat.com with any questions.
![]()
This page has been visited times since 9/18/99.
[Click HERE for LIVE Chat NOW!!!]
[ChanOps]
[Chat]
[Stats] [Schedule] [SuperChats]
[Lessons] [Links]
[Send a Quilty Postcard to your
Friends!!!]
![]()